
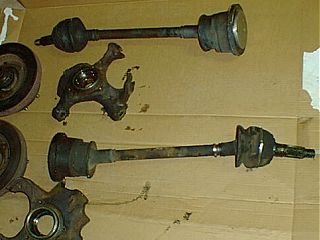
 | Here are the major components of the front suspension with the exception of the control arms, which were not removed as part of this project. Replacement of the control arm bushings will be a future undertaking. The removal and replacement of the front wheel bearings is detailed in Front Wheel Bearing Replacement. |
| The stub axle was clamped in a vise with the jaws padded to avoid damaging the axle splines. It's a good idea to have a helper hold the axle shaft upright. If allowed to fall, the constant velocity(CV) joint may be damaged. The old boot clamps were cut with wire cutters and the old boot cut away with a utility knife - being careful not to scratch the axle shaft. | 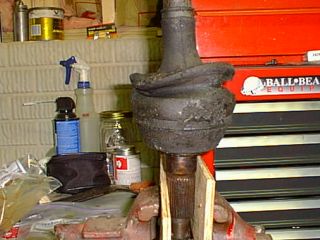 |
 | After removing the old boot, you must probe around in the grease to find the open side of the retaining clip. Once you've found the open side of the clip, have your helper pull up on the shaft while you spread the clip and the shaft should pull out of the joint easily. In this picture, the clip is still in place after the shaft has been removed and the open side is at the six o'clock position. |
| With the outer CV joint still clamped in the vise, push down on one side of the "cage" to tilt it up while keeping the inner race level. | 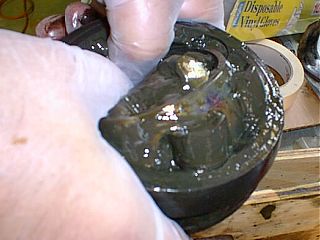 |
 | With the "cage" tilted up above the CV joint housing, gently push out one of the balls with your finger. There may be some resistance from the "cage", but it should not require much force. Repeat the process to remove the other five balls. |
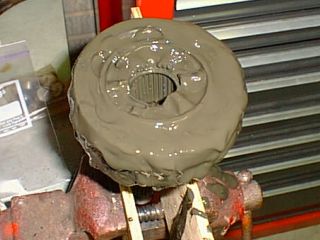
| The first step in removing the inner CV boot is to pry up the areas where the metal skirt of the boot is crimped into the joint housing. |  |
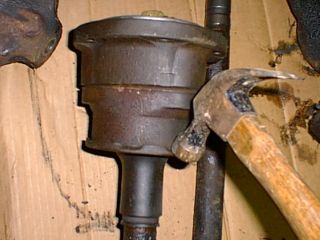 | Then tap on the top of the skirt with a hammer to slip the skirt off the CV joint housing. There is a large "O" ring between the housing and the skirt which will present some resistance to the skirt slipping off. Patience pays off here - tap gently with the hammer rotating the shaft 120 degrees after each tap. |
| After the boot is off, stand the shaft assembly on the inner joint housing and lift straight up on the shaft. Be careful as the three rollers are retained only by the joint housing and will slip off if the shaft is tilted. Slip each one of the balls off, being careful to get all the needle bearing rollers at the same time. | 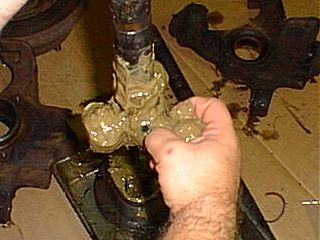 |
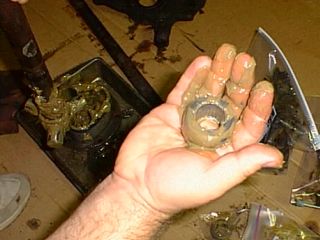 | If done correctly, the roller will slide off and the grease will hold all the little needle bearings in place. |
| The last disassembly step is to remove the retaining clip holding the spokes in place on the axle shaft. | 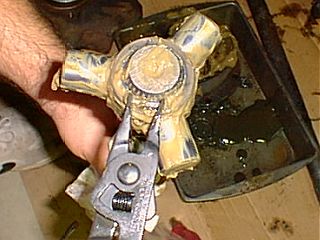 |
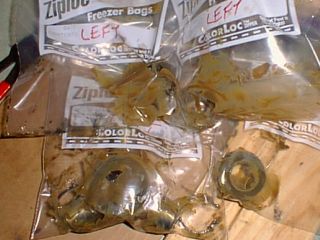 | Parts should not be interchanged between the CV joints. To help keep things organized, I used ZipLoc® freezer bags to identify the parts after they were removed. |
| After everything is cleaned up with mineral spirits, it's time to start putting everything back together. The reassembly of the CV joints is basically the reverse of the disassembly sequence. The retaining clip is missing here and must be inserted before the shaft. | 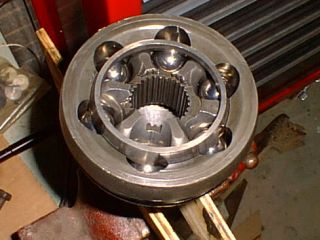 |
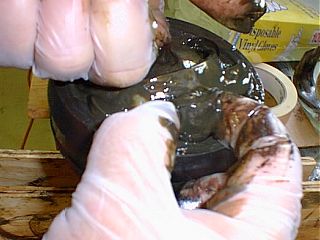
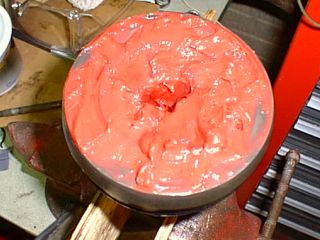 | I'm using Redline CV-2 synthetic grease - others use Mobil1 grease with satisfactory results. The joint gets packed completely, being careful to eliminate any air pockets. If you use the grease packets that come with most kits, use just enough grease to fill the joint and the folds of the boot. Using too much grease will cause overpressure in the joint resulting in grease leaking from the joint or the boot popping out of the retaining groove. |
| Using a band clamp tool(KD Tools 3191 shown here available at NAPA) tighten the clamp with a small torque wrench to 65 in-lbs. Once the band is tightened to the specified torque, hold the wrench and band tool carefully as you bend the band over. Don't allow it to slip back and lose tension. It's a good idea during the cleaning process to check the retaining grooves in the joint. I used a small strip of emery cloth narrow enough to fit the grooves to get down to bare metal. Use a small ball-peen hammer to close the clamp and then cut off the excess band with metal snips. | 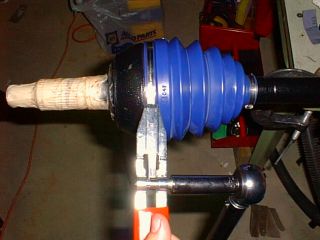 |
member of |
||||
 |
 |
Analysis by |
||