
 | The three bolts are removed(a Sears Craftsmen box end wrench works well) from the seal retainer and the bolt holes are chased from the rear with a 3/8 - 16 tap. The inner seal is removed. |
| The "blue" and "red" tools both use push plates and have a ball bearing in the center bolt. This should be kept lubricated. I used a dab of wheel bearing grease each time before use. | 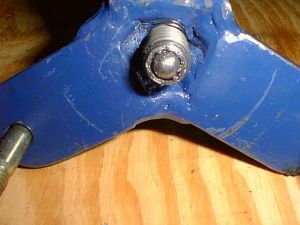 |
 | This is the arrangement of the "blue" tool to push the bearings and hub out of the steering knuckle. Note the different length bolts required. |
| The push plate is laid on the inside bearing and the "blue" tool is bolted to the back of the knuckle. You did remove the inner seal, didn't you? Tighten the center bolt down by hand until it contacts the push plate, then use an impact wrench to push the hub and bearings out of the knuckle. | 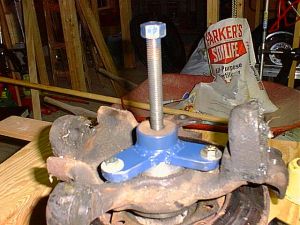 |
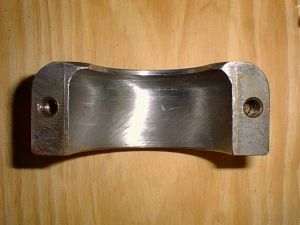 | With the hub and bearings out of the knuckle, it's time to remove the bearings from the hub. The Thoma tool set uses a split collet to remove the bearing. In this photo you can see the radius cut into the collet. This allows the collet halves to slip between the bearing and the seal. As you tighten the collet, it pushes down on the seal and gets a better grip on the bearing, so you should be sure that the collet is tightened until the two halves mate completely. |
| This is the arrangement of the "red" tool for removing the bearings. | 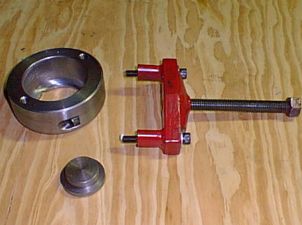 |
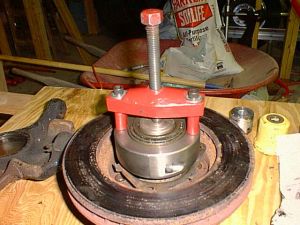 | The collet is first installed by pushing the outer seal down as far as possible and the placing the two collet halves where the thin edges are between the outer bearing and seal. The collet halves must be tapped in and down with a hammer until the two allen bolts can engage the screws. Then by alternately tapping with a hammer and tightening the screws, the collet halves are drawn completely together. The small push plate is then placed over the end of the hub and the "red" tool is bolted to the collet. Tighten the center bolt down by hand until it contacts the push plate, then use an impact wrench to pull the bearings off the hub. |
| After everything is cleaned up and the bearings are packed with grease, it's time to put it all back together. Ken Thoma recommended using a high quality synthetic grease. I like the Redline CV-2, which was developed for off-road racing applications with high angular velocities, but Mobil1 and Amsoil synthetics can also be used and may be more readily available. | 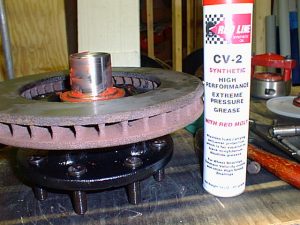 |
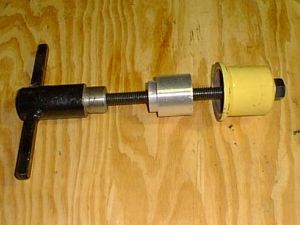 | This is the arrangement of the "yellow" tool used to push the bearings back on the hub. Note the "T" bar that goes underneath the hub and the aluminum bearing guide that keeps the bearing assembly lined up while it's pushed onto the hub. |
| First, remember to place the retainer and outer seal on the hub. The "T" bar is placed under the hub and the aluminum bearing guide is placed on top of the hub. The bearing assembly is placed onto the guide, the yellow cup on top of the bearings and the center bolt is threaded through all this to engage the "T" bar. Tighten the center bolt down by hand and then use an impact wrench to pull the bearings onto the hub. | 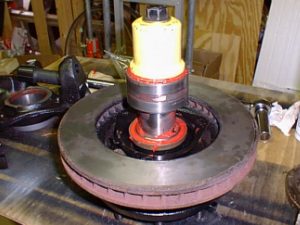 |
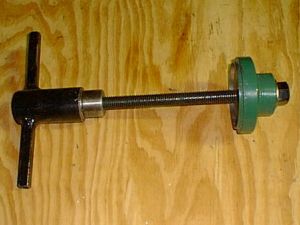 | This is the arrangement of the "green" tool used to push the knuckle back on the hub. |
| The knuckle is placed on top of the hub and the green cup is placed on the knuckle. The center bolt threads through this assembly and engages the "T" bar. Tighten the center bolt down by hand and then use an impact wrench to pull the knuckle onto the hub. Work slowly being certain to keep the knuckle from "cocking" to one side. | 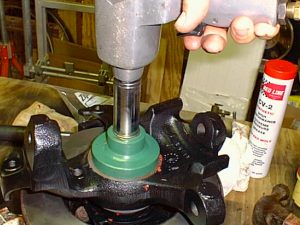 |
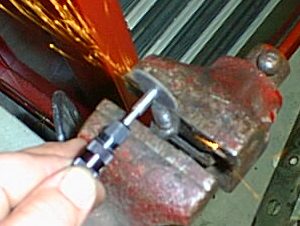 | A trick that Ken Thoma recommended is slotting the end of the seal retainer bolts... |
| Then you can use a small screwdriver to back each bolt into place while applying some pressure with your fingertip to get it started. | 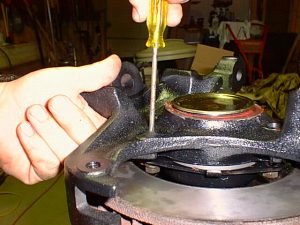 |
member of |
||||
 |
 |
Analysis by |
||